
Guidelines To Our Therapies
Our therapies consist of Homoeopathy, Home manageable Naturopathy, Yoga, Acupressure and Herbalism. Here are some tips on each of these.
Homeopathy:
- Homoeopathy is the most economical but still very effective mode of treatment. By keeping a few medicines at home, just at the expense of approximately few hundred Indian National Rupees per annum for the entire family, you can take care of and cure all casual, acute, seasonal, and emergency conditions. Moreover, you will never have to look after the availability and timings of your doctor, but you will be able to provide spontaneous treatment to your loved one.
- Always buy medicines from a genuine shop and of an authentic brand. We prefer German medicines made by Dr. Reckeweg & Co. and use this brand only. However, some medicines, particularly those made from Indian herbs, are not made by Dr. Reckeweg & Co., and in that case, medicines made by SBL can be used as an alternative.
- Do not chew or swallow homeopathic pills but suck them slowly.
- Do not touch medicines by hand. If medicines are taken as pills, patients should take them in the cap of the phial and place the medicine on the tongue. If a medicine is taken in liquid form, add some water as indicated with each of them herein.
- Always maintain a gap of 30 minutes between homeopathic medicine and any food or drink except water, where a gap of 15 minutes is sufficient.
- Patients should take at least the morning and evening medication on an empty stomach.
How to take Homeopathy medicines?
- When a patient takes medicines 4 -5 times a day or even at a 1 to 2-hour gap, take about 40 -50 ml water, add 4 to 5 drops of medicine, and shake the container slightly. Take about 10 ml at a time. Alternatively, purchasing pills (known as globules) and some phials from any homeopathic store is a more convenient way. Different sizes of globules are available. No. “40” globules would be ideal. Fill these globules in a small phial and pour few drops of medicine in it. The number of drops will depend upon the size of the phial. Usually, a patient must add about 30 drops of medicine in a vial of two drams. As a thumb rule, optimum drops would mean that after the medicine is absorbed in globules, globules must dissolve in the mouth in just 1 -2 minutes of sucking it. Fewer drops will take more than two minutes to dissolve in the mouth, while excess drops may result in globules dissolving in the vial. A patient needs to take just 4 to 5 globules at a time.
- When a patient takes medicines only once a day, they should take about 10 – 15 ml water, add two drops of medicine, and take the medicine. Patients should take such medication early in the morning on an empty stomach.
When a patient takes medicines too frequently—for example, every 5 to 15 minutes—take about 50 to 60 ml water in a cup or bowl and add 4-5 drops of medicine. Take just one teaspoon from it at a time.
- Cold Pack: For your convenience, different sizes of reusable gel packs are available at a nominal price at the chemist shop and online retail stores. Keep the gel pack in the freezer for 4-6 hours to make it cool enough. You can then apply this cold pack to the affected area for the duration as indicated in the treatment section of specified diseases requiring this pack.
Alternatively, you can create a cold pack by dipping a small to medium-sized towel (as per the required size) in iced cold/ fridged water. Squeeze it entirely so that no water drop should drip. Fold it two/ three times and keep it on the affected area. You will have to replace it after a few minutes as it starts losing its coldness.
You can also put a few ice cubes in a small plastic bag. Ensure that water does not leak or ooze from the bag. Then, rub the bag on the affected area for the required duration.
- Hot Pack: Rubber bottles for fomentation are available at a nominal price at the chemist shop and online retail stores. Fill the bottle with boiling water and keep it on the affected area for the required time. If you feel its heat more than bearable, put a towel or some other thick cotton cloth below it to maintain optimum heat. You can then apply the hot pack to the affected area for the duration as indicated in the treatment section of specified diseases requiring this pack.
Alternatively, you can dip a towel in hot water, squeeze it completely to ensure zero dripping of water from it, fold it to the required size, and keep it on the affected area. You will have to replace it frequently as it starts losing its hotness.
- Hot and Cold Pack/ Fomentation: Keep both packs ready, as above. Apply the hot pack for four minutes, followed by the cold pack for one minute only. Repeat this process until the required duration, as indicated in the treatment section of specified diseases requiring this pack.If the patient can dip the affected area in water, keep two pots/buckets ready: one bucket with hot water and the other with cold water. Dip the affected part in hot water for four minutes, followed by cold for one minute; repeat until the required time is attained.
- Mud Pack: For mud pack, do not use surface mud but take mud from 1½ feet to 2 feet beneath the surface. Take the required quantity in a pot and pour some water to make a thick paste. Leave it for a few hours to become soft. Take a thick cotton cloth of the required size. Dip it in water and squeeze completely. Lay it on a smooth surface, and spread wet mud equally to make a ½ to ¾ inch thick layer. Pick the cloth gently on your palm and lay it on the affected area in reverse position, i.e., mud should directly touch the affected area’s skin. The mud layer must be at least ½ inch bigger on all four sides of the target area. Mud must be soft enough, but water should not drip or ooze out. The cotton cloth should be 1 inch bigger on all four sides of the mud layer. Please leave it in the target area for the required duration. When the required time is over, gently remove it and wash the targeted area with water. If direct washing of the target area is not possible, wipe it with a wet cloth or towel 3 to 5 times till the area is completely clean. After each wipe-through, you will have to rinse the cloth. You may either throw away the mud or leave it in open direct sunlight for at least two months to make it compatible for reuse.
- Spine Bath: A special tub is required for a spine bath but is not very expensive. Two kinds of tubs are available in the market:
Small-size tubs. A patient could keep a smaller tub on the ground, or some raised platform (see Figure 1). After filling the tub with 2½ inch to 3-inch-deep cold water, the patient must lie in it only on their back. They will remain submerged in the water for the required duration. Both fiber and metal-made tubs are available. Metal tubs will be economical at about INR 2,000, while fiber tubs will cost approximately INR 4,000 to INR 5,000. The small tub is portable, so a patient can tilt it with a wall.
Full-size tubs. In these tubs, the back will not remain submerged in the water; instead, water will be sprayed on the whole spine using jets fitted in the tub. Sitting-type and laying-type tubs are available (see Figure 2). These may cost around INR 25,000. These tubs shall remain fixed in the bathroom or any other place and require installation. Also, these tubs require a connection to a water tap from which the tubs’ built-in tank fills water. A power connection to switch on the in-built motor, enabling jets fitted into it to spray water on your spine, is also required. Used water will go back into the in-built tank. Once the bath is over, the patient drains out all the water using a liver attached to the tub. You can opt for any of these tubs depending on your convenience and available space.
Alternatively, you can go to a naturopathic center to take this bath, which may prove expensive in the long run because the center will charge at least INR 100 to INR 150 per bath plus conveyance expenses and time factor. Since patients who require strengthening their nervous system will have to take such a bath daily for a long time, they may find it convenient to arrange a tub at home.
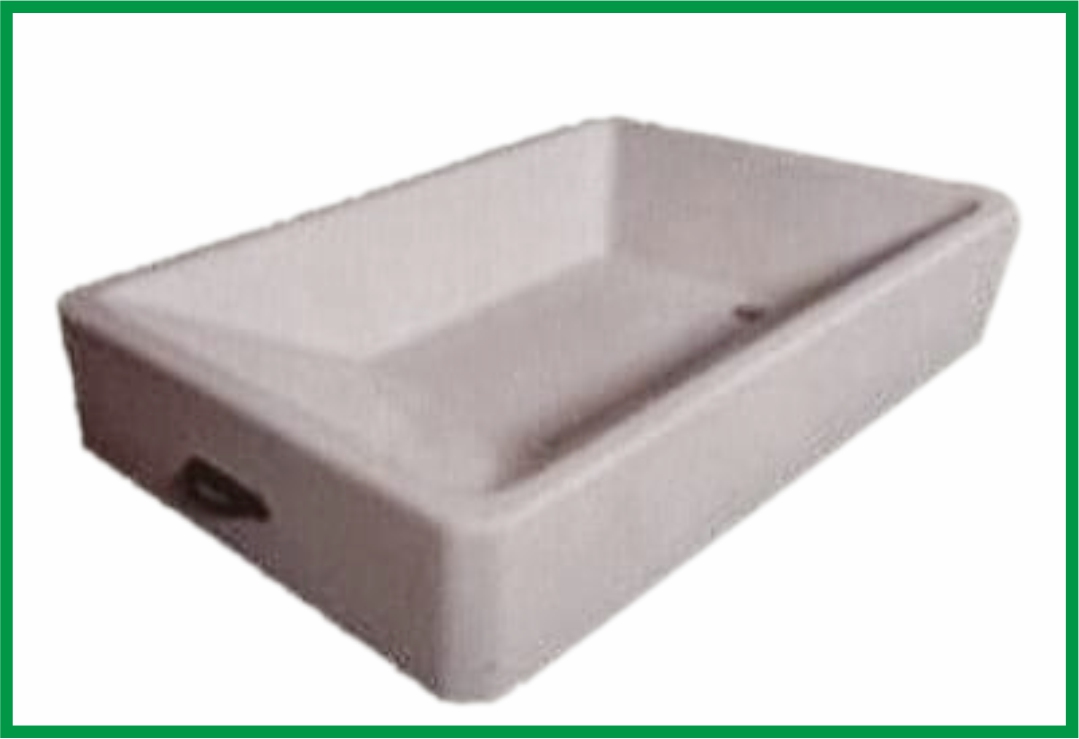
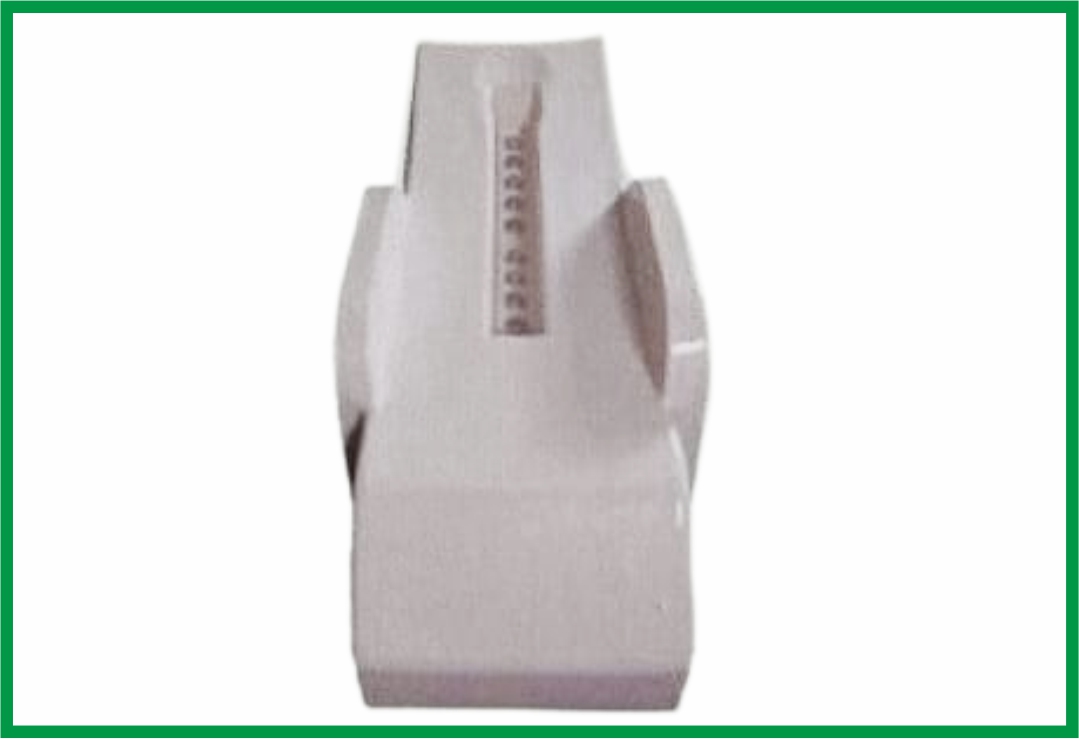
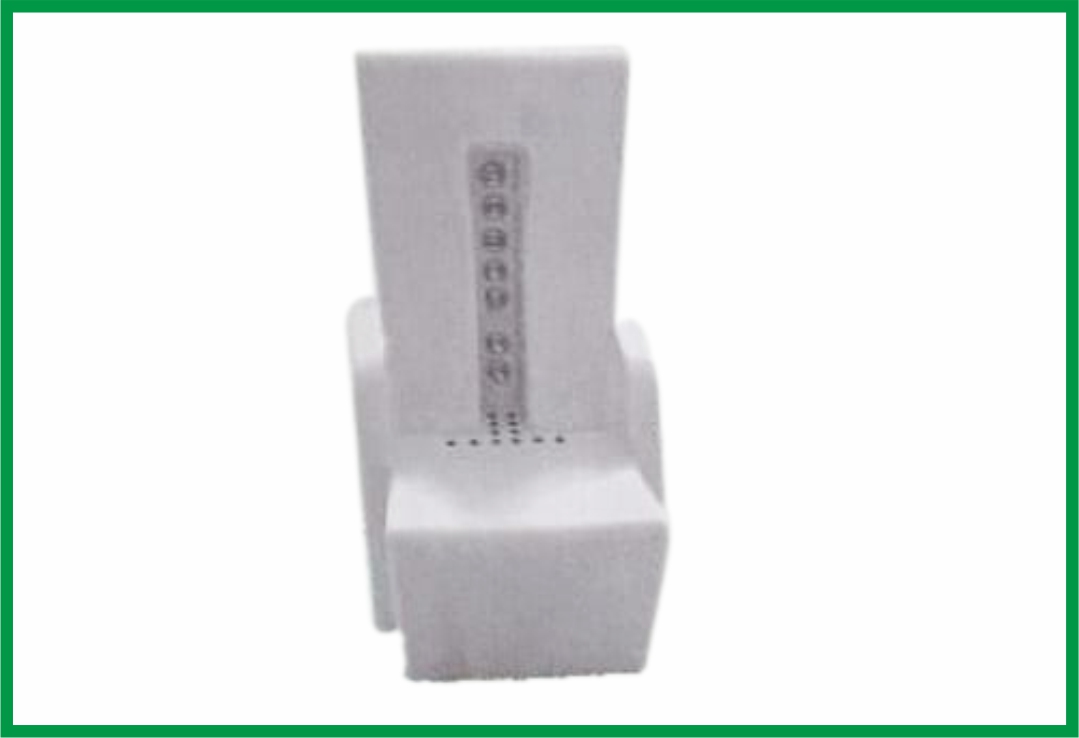
Figure 2: Full-size tub
- Steam: Taking steam on a localized part or for the respiratory system may not be difficult, as many small steamers are available in the market, generally used by beauty parlors. However, to take full-body steam, you need to purchase a steamer. There are a few options for steamers.
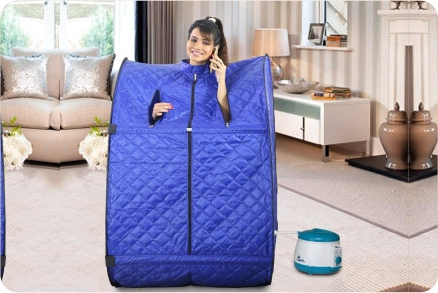
Portable steamer. The most economical is a portable steamer, which can be folded and kept in a bag when not in use (see Figure 3). To use you must expand it. A small steam generator is kept outside and connected to the chamber through a small pipe. In about 10-15 minutes, steam will start coming into the chamber. You must place a stool inside the chamber and sit on it for the required time. Afterward, you can come out of the chamber, switch off the steam generator, remove the stool, and either fold it partially and keep it alongside any wall or even fold it entirely and keep it in the bag. After warming you up, the steam generated will get condensed on the floor, which will require sweeping. Such portable steamers cost about INR 4,000 and are available through online retail stores.
Full-length steamer. Such steamers are also available on the market with several built-in features. You have to switch on the steamer and sit inside. You can buy it from any good sanitary store on order. Most of these steamers come from branded companies like Jaguar. Full-length steamers are available in many shapes: square, rectangular, etc. The most suitable for a home may be the one that you can fit in a corner and front side will be round-shaped (see Figure 4 & 5). Such a steamer will permanently remain fixed in your bathroom and may cost you around INR 1,50,000, but the cost may vary from brand to brand.
Modified Shower Enclosures. If you have a shower enclosure in your bathroom, you can make a similar arrangement with a few modifications and arrangements . Cover the top of your enclosure so the steam generated remains intact inside the chamber. You can get an electrical steam generator fitted inside or outside your bathroom, which may again be expensive and have drawbacks. In case of any mechanical or electrical problem, you must contact the manufacturer to send their engineer, which may be costly and time-consuming. Alternatively, you can buy an electric pressure cooker of 10-liter size with a 2000-watt coil and connect its steam outlet to the shower enclosure. A plumber will be able to engineer this. Depending on the size of your shower enclosure, you may have to buy and use more than one pressure cooker. Generally, 2 to 3 cookers must be sufficient. In summer, you may need to use two, but three in winter. This entire fixture may cost you around INR 50,000 (INR 8,000 to INR 10,000 per pressure cooker plus enclosure coverage and fitting charges) if you have a shower enclosure in your bathroom and around INR 1,00,000 if you need to have a shower enclosure also. You can even visit some naturopathic centres in your area to take full body steam.

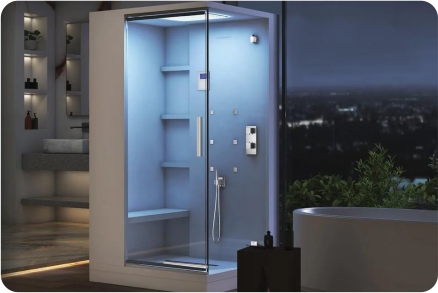
Enclosure (Round front) Enclosure (Square shaped)
Acupressure:
In Acupressure, you must put pressure (i.e., to press) on the points related to your problem. You have to apply the pressure like a pump. That means pressing the point and releasing pressure. This process needs to be done repeatedly as advised by the doctor. You can do Acupressure in two ways:
Using Thumb. Before using your thumb for pressure, ensure your nails are properly cut so as not to harm the skin. Fold the terminal joint of your thumb at 90 degrees (as shown in Figure 6) and exert pressure on the desired point (as shown in Video 1).
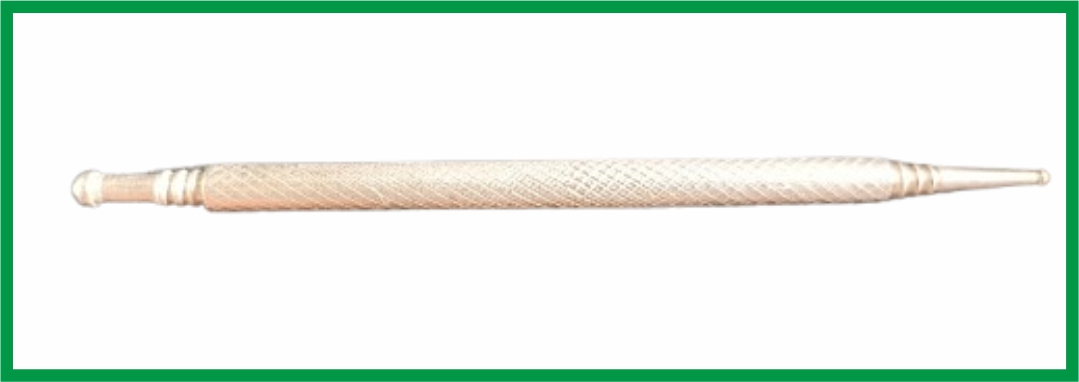
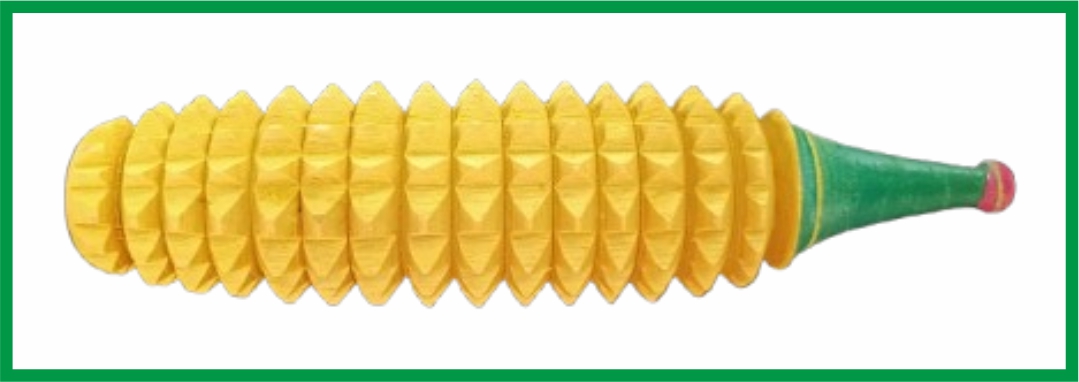
Using a Jimmi. Jimmi is a small metal or wooden piece (see Figures 7, 8, and 9). It is available in acupressure shops, online retail stores, and with any acupressure therapist. A Jimmi costs less than INR 100.
Metalic Jimmi is most suitable for pressing smaller points, while wooden is for bigger ones. Depending on the size of the point on which pressure is to be given, a patient may choose both sides of the Jimmi. Wooden Karela is most suitable for putting simultaneous pressure on multiple points in the palm or sole.
Sometimes, you may be required to pressure a particular area by rubbing it. In such cases, apply some Vaseline to the skin before rubbing to facilitate smooth and deep rubbing. The area can be rubbed with the thumb, jointly with the thumb and index and middle fingers, or with Jimmy, as may be practical and suitable.

- Yoga must be done on an empty stomach in an open area. The most preferred time is early morning. In case of sickness, if you are required to do yoga more than once a day, maintain at least a 4-hour gap between food and yoga.
- You must always start yoga with warm-up exercises and complete yoga with Shavasana.
- You should not perform yoga forcefully. It may be difficult to achieve perfection in attaining the complete pose of certain Asanas. Achieve only as much as you can achieve comfortably. Achieving slight stretch is a must, but in no way too much stretch must be attempted to achieve a better pose.
- Instead of maintaining any pose for a long time, it may be better to hold it for 10-15 seconds only and repeat it 10-20 times. In difficult cases, start with five times and increase gradually.